How to build a bicycle wheel with no previous experience .
A friend of worldwidecycles , Paul McCarthy recently decided that he would like to build a set of wheels for his day to day commuter bike from scratch . Having never attempted to do so in the past he set about finding out how to do it correctly and keep it within budget . Here’s how he got on ;
Dear Barry and Ray,
Thanks for your interest and help in my recent wheel building task. The last time I was in (trying to locate a freewheel remover to undo a Regina Corsa freewheel) I mentioned that I had used a wheel building guide which was written by Roger Musson and which I had downloaded from the web for a fee of £9. Aidan (of Aidan and Mieke) had lent me his own copy of ‘The bicycle wheel’ by Jobst Brandt and having consulted both, I set to work. The Musson book suggested building your own service tools like truing stand, truing guages, nipple driver and dishing tool and because I wanted to avoid spending a lot of money on items like these which had been made by someone else, I followed the ‘Musson route’ and set to fabricating these items for myself. Because I was following Musson to make the tools, I naturally enough ended up spending more time on Musson than Brandt although I did read the latter pretty much all the way through skipping only those bits of the text which I thought fitted ‘background reading’ which I could do later. One early problem was sourcing a new set of hubs as my bike is an antique with 120mm dropouts at the rear. It is an excellent frame though and I never, but never abandon a good thing (rather like your blog comment Barry on 14/12/08…. “Just when you’ve given up all hope and your at 180 bpm going over the top of ‘The Haysheds’ and your legs feel like two sacks of jelly as you struggle against a block headwind an apparition shows itself and all fate is restored in humanity . Some of the group had turned and had come back for us . I felt like a Navy Seal – Never leave a man behind . Thanks Leslie , Geoff , Bobby , Johnny , Andrew , Big Ben , Paul and John”). So I went to Ebay looking for a set of Campag Record hubs. There are very few at 120mm oln and when I eventually found one it was at a shocking price. Hmmm. Then up for auction came a ‘New In Box’ pair of Miche Competitions for reasonable money and I bought them. Through Wordlwide Cycles, I got hold of a pair of Mavic A719s and sufficient DT spokes for the job with some over as spares. Musson has a section on the determination of spoke length and having read this before ordering the spokes I felt that the work had finally started. So now I had all the kit I got Musson’s guide out again and set to with the wheel building. Having given it some thought, I built the rear wheel first and the front second reasoning that if I was to make any mistakes they would likely be found in the first wheel built. If this failed whilst riding it would be bad but not so bad as a front wheel failure. So after hours of fun in the garage with all the kit and making steady progress I felt I had got the job done. And the result? A pair of wheels that I set out on very gingerly and without a lot of confidence, looking down all the time half expecting disaster but to my enormous satisfaction they did not distort or show any sign of failure which is just as well as part of my maiden ride took me along the Suir towpath near Sir Thomas’ Bridge where the water was very deep and very fast after recent heavy rains and had I spilled into it following a wheel failure they would never have found me. My bike yes, but me no.
And the conclusions?
As follows:
1. Musson’s is brilliant. A first class resource to the wannabe wheel builder.
2. The local bike shop and wheel building friends are great for moral/technical support.
3. Build your own assembly tools – it is easy and they work.
4. There is no substitute for taking your time and avoiding short cuts.
5. You need to concentrate so try to find a place to work with few distractions.
6. The total cost of my hardware broke out as follows;
Truing stand – €28 (€20 for a local engineering firm to make a pair of drilled plates from 6mm steel. The rest was timber and fixings).
Truing gauges (radial and lateral) – €0 (scrap garage stuff).
Nipple driver – €0 (scrap screwdriver and off-cut of dowel).
Spoke length gauge – €0 (Ray gave me two scrap spokes from the shop – thanks Ray!)
Spoke key – €10 (it has various size spoke keys on it).
Masking tape – about 2c worth from a roll costing €2.
Yellow insulating tape – 1c worth (taped over the valve hole to make it easy to see).
Roger Musson’s excellent guide – £9stg from:
http://www.wheelpro.co.uk/wheelbuilding/book.php
7. The sense of achievement is massive. Maybe I was expecting it to be more difficult but I am very happy with the end product!
Attached are a couple of JPEGS showing the workshop kit and the finished wheels.


Thanks very much Paul for sharing this !
Barry
www.worldwidecycles.com


9 COMMENTS
fred turton
Roger I have been given one of your books. I am interested in the equation for length of spoke but the only bit I can’t reason out is the Flange Offset, F. How is this values found. There are two hubs shown on page 71but which measurement is F?
I don’t know when the book I have was printed but is it worthwhile buying a later version?
fred turton
Roger I have been given a copy of one of your books. I am interested in the equation for Spoke Length but the only bit I can’t reason out is “Flange Offset”, F. How is this value found? There are two hubs shown on page 71 but which measurement is “F”?
I don’t know when the book was printed but is it worthwhile buying a later version?
Incidently, log on to Abebooks and type in the book details. There is only one listed and the price is £18.
Paul McCarthy
Fred,
In the most recent copy of the text, the pdf file ‘Professional Guide to Wheelbuilding’ it expains on pages 97 and 103 how to determine flange offset and this explanation is aided by clear diagrams. To put it simply it is the distance between the centreline of the hub (the halfway point between the locknuts) and the internal face of the hub flange on each side of the hub.
Hope this helps.
I can only repeat my admiration for the intelligent and logical explanation of wheel building as I read it in the pdf file downloaded from the www, as written by Mr. Musson. And all for a very reasonable £9, the price of a few first grade spokes. When I write ‘reasonable’ it is entirely based on the extreme clarity and unambiguous nature of the text and diagrams. Any fool can write a rambling, semi-coherent technical guide and charge for it and I’m sure I could lay my hands on a few. Musson’s guide is not one of these and is worth every penny of the price asked. Hope this helps
Paul
Pete Lewis
I’d echo everything said above. I built my first wheel with a hub salvaged from one wheel, and rim and spokes from another. Spokes were only long enough for 2X but it was still a better wheel than any factory effort. My son used it on a 1000 mile tour last year !
Paul McCarthy
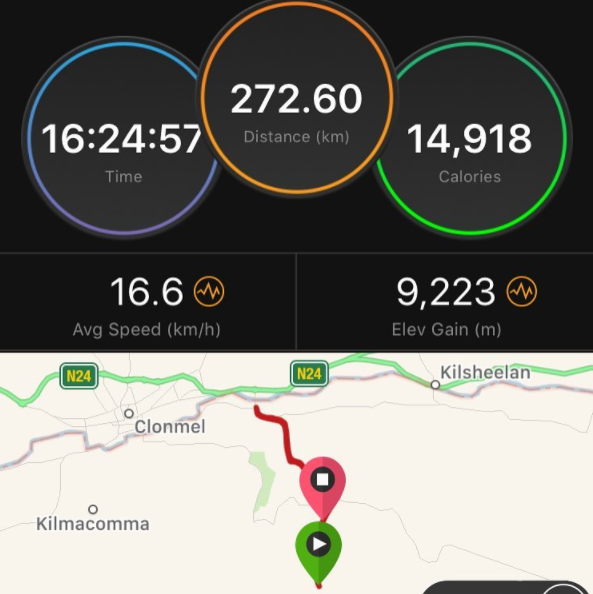
‘These Wheels’ which are the subject of the blog here I built last winter and have just carried me over 700km through Poland in which I encountered long stretches of unsurfaced roadway, forest tracks which I had to push through because of the sand they were comprised of, cobbled streets and some atrocious ‘roads’. No spokes loosened or broke, the rims stayed true and the old Miche hubs ran very smoothly. Bike was entirely loaded over the rear wheel which, including the rider offered a load of some 105kgs. Home build wheels work!
mike
its a great book to learn from,however I dont think he covered the tension issue enough though,being a new wheel builder i was looking for what tensions are too high and what tensions are too low,i think this topic could have been covered alot more with a few actual numbers,also newbies cant build a wheel from tone,I had to go find a tension meter than go to a few websites to see what tensions were safe and what tensions were not safe,i saw one reference with a figure in the book 120kgf,now that tension will not be safe for all builds
Peter
Hi Mike,
The spoke tension depends on many factors including the number of spokes, type of lacing, spoke type, shape and thickness, which wheel they are on and which side of the wheel (if it’s the rear wheel).
A spoke tension meter usually comes with a spoke tension table, which is useful. However, there are online tension calculators available also and may be handy. Here is one example:
https://www.parktool.com/en-int/wta
Good Luck with your build.
Daron Mckellip
Wow| That’s very very great job!!I will certainly try to do this as soon as possible..
Peter
That is a great article, thank you for sharing!
Thanks to Paul, his advise and the tools I have also built my own set of wheels. They are by far the nicest wheels I have ever had. I used a set of 7700-series Shimano Dura Ace Hubs (28F, 32R) that I sourced second hand (they are quite old, but excellent), Sapim Laser / Race spokes and the H Plus Son Archetype rims.
The wheels have now a good bit over 20k km on them and I will have to replace the rims in near future, but they never needed any repairs or maintenance (except changing the lubricant in the bearings once).
All The Best,
Peter